artiss gas lift bed assembly instructions
Artiss Gas Lift Bed Assembly Instructions: A Comprehensive Guide
This guide provides detailed steps for assembling your Artiss gas lift bed‚ covering everything from unboxing to functionality testing. Explore Instocks and Aysar3000 video tutorials for visual aid!
Artiss offers innovative bed frames designed for modern living‚ and the gas lift bed is a standout feature. This bed combines style‚ comfort‚ and exceptional storage solutions‚ maximizing space in any bedroom. Models like Piuma and Bellezza showcase Artiss’s commitment to quality and design.
The gas lift mechanism allows effortless access to a spacious under-bed compartment‚ perfect for storing bedding‚ seasonal items‚ or extra belongings. This 3-in-1 design expands your home’s storage capacity without sacrificing valuable floor space. Assembly is straightforward with the help of detailed instructions and readily available online resources‚ including videos from Instocks and Aysar3000‚ ensuring a smooth setup process.
Safety Precautions Before Assembly
Prior to beginning the assembly of your Artiss gas lift bed‚ ensure a spacious and well-lit workspace. Protect your flooring with a drop cloth or cardboard to prevent scratches during the process. It’s crucial to have a second person assist with lifting and maneuvering heavier components‚ like the bed frame and gas lift mechanism‚ to avoid strain or injury.
Always refer to the provided assembly instructions and parts list (BFRAME-G-LED-LUMI-D/Q) to ensure correct component identification and proper installation. Do not attempt to modify or force any parts together. Keep small parts and packaging away from children to prevent choking hazards. Wear appropriate safety gear‚ such as gloves‚ if desired.
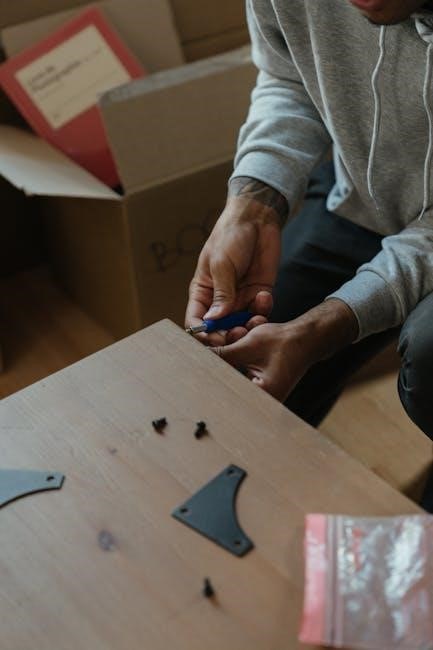
Unboxing and Parts Inventory
Carefully unpack all components from the Artiss gas lift bed packaging. Avoid using sharp objects that could damage the parts. Lay out all items on a protected surface for easy identification. Begin by comparing the physical components with the detailed parts list (BFRAME-G-LED-LUMI-D/Q) included in the instructions.
Verify that all listed parts are present‚ including the frame sections‚ gas lift struts‚ slats‚ hardware‚ and headboard (if applicable). Note any discrepancies immediately and contact customer support. Familiarize yourself with each component before proceeding to the assembly stage. Proper inventory ensures a smooth and efficient assembly process.
Identifying All Components
Begin by recognizing the main frame pieces: headboard‚ footboard‚ and side rails. Distinguish the gas lift struts – these are crucial for the bed’s functionality. Locate the wooden slats‚ which provide mattress support. Identify all hardware‚ including bolts‚ screws‚ washers‚ and any specialized connectors.
Pay close attention to the LED lighting components (if your model includes them). Separate the lifting mechanism parts‚ understanding how they connect to the frame and struts. Familiarize yourself with the different sizes and types of screws to avoid confusion during assembly. Accurate component identification is key to a successful build.
Checking Against the Parts List (BFRAME-G-LED-LUMI-D/Q)
Carefully compare all unpacked components against the official parts list for model BFRAME-G-LED-LUMI-D/Q. Ensure you have the correct quantity of each item – headboard‚ footboard‚ side rails‚ gas lift struts‚ and wooden slats. Verify the presence of all bolts‚ screws‚ washers‚ and specialized connectors.
Confirm the inclusion of LED lighting components if applicable to your model. Double-check for the lifting mechanism parts and their corresponding hardware. Note any discrepancies immediately; missing parts can halt assembly. Refer to the assembly instructions for a visual representation of each component. Accurate verification prevents frustration later.
Tools Required for Assembly
Successful Artiss gas lift bed assembly necessitates a few essential tools. A Phillips head screwdriver is crucial for securing most bolts and screws. An adjustable wrench will be needed for tightening nuts and bolts on the frame. A rubber mallet assists with gently connecting frame pieces without causing damage.
Consider having a power drill with screwdriver bits to expedite the process‚ but use it cautiously to avoid over-tightening. A measuring tape ensures accurate slat placement. Gloves protect your hands‚ and a soft cloth prevents scratching surfaces. Having these tools readily available streamlines the assembly process.
Assembling the Bed Frame Base
Begin by attaching the side rails to the footboard and headboard‚ ensuring proper alignment. Utilize the provided bolts and tighten them securely with a wrench. Double-check that all connections are flush and stable before proceeding. The frame’s structural integrity depends on these initial connections.

Next‚ carefully connect the headboard and footboard‚ again using the appropriate hardware. Refer to the assembly instructions (BFRAME-G-LED-LUMI-D/Q) for specific guidance on bolt placement. Ensure the frame is square and level; this is vital for the gas lift mechanism to function correctly.
Attaching the Side Rails
Begin by aligning the side rails with the pre-drilled holes on the headboard and footboard. Secure them using the provided bolts‚ washers‚ and nuts – referencing the BFRAME-G-LED-LUMI-D/Q parts list is crucial. Tighten the bolts gradually in a diagonal pattern to ensure even pressure and prevent warping;
Inspect each connection to confirm a snug fit; loose rails compromise the bed’s stability. Pay close attention to the orientation of the rails‚ as some may be specifically designed for either the left or right side. Proper attachment is foundational for the entire assembly process.
Connecting the Footboard and Headboard
Carefully position the headboard and footboard upright‚ ensuring they face the correct direction. Align the side rails‚ previously attached‚ with the corresponding slots or pre-drilled holes on both the headboard and footboard; Utilize the provided hardware – bolts‚ washers‚ and nuts – to securely fasten these components together.
Tighten the bolts incrementally‚ employing a diagonal tightening pattern to distribute pressure evenly and maintain structural integrity. Double-check all connections for firmness‚ as a stable frame is paramount. Refer to the BFRAME-G-LED-LUMI-D/Q parts list to verify hardware usage.
Installing the Gas Lift Mechanism
This step involves attaching the gas lift struts‚ crucial for the bed’s functionality. Locate the designated mounting points on the bed frame – typically along the side rails. Securely fasten the gas lift struts using the provided bolts and washers‚ ensuring proper alignment. Refer to the assembly instructions for BFRAME-G-LED-LUMI-D/Q for precise positioning.
Confirm the lifting mechanism is firmly attached to the frame before proceeding. Watch Aysar3000’s TikTok videos for a visual guide on this process. Proper installation is vital for smooth and safe operation of the gas lift feature.
Mounting the Gas Lift Struts
Begin by identifying the left and right gas lift struts‚ as they are often specifically designed for each side. Position each strut within the designated mounting brackets on the interior side rails of the bed frame. Align the holes in the strut with those in the bracket‚ and insert the provided bolts.
Tighten the bolts securely‚ but avoid over-tightening‚ which could damage the frame or struts. Ensure both struts are mounted at the same height and angle for balanced lifting. Consult the Artiss assembly instructions (BFRAME-G-LED-LUMI-D/Q) for detailed diagrams and guidance.
Securing the Lifting Mechanism to the Frame
Once the gas lift struts are mounted‚ connect the lifting mechanism to the bed frame. Typically‚ this involves attaching metal plates or brackets to the headboard and footboard‚ which then connect to the struts. Use the appropriate bolts and screws from the hardware pack‚ ensuring a snug fit.
Double-check all connections for stability and alignment. Refer to the Artiss assembly instructions (BFRAME-G-LED-LUMI-D/Q) for specific details on bracket placement. Proper securing is crucial for safe and smooth operation of the gas lift function‚ preventing unexpected drops or imbalances.
Attaching the Slats
Slats provide essential support for your mattress and are a critical component of the Artiss gas lift bed. Ensure proper slat placement and spacing according to the assembly instructions (BFRAME-G-LED-LUMI-D/Q). Typically‚ slats are evenly distributed across the bed frame‚ resting on designated supports.
Maintaining consistent spacing is vital for even weight distribution and preventing mattress sagging. Confirm slat stability by gently applying pressure to each one. Secure the slats using the provided hardware‚ ensuring they won’t shift during use. A well-supported slat system is key to a comfortable and durable bed.
Proper Slat Placement and Spacing
Accurate slat placement is crucial for mattress support and the gas lift mechanism’s functionality. Refer to the BFRAME-G-LED-LUMI-D/Q model instructions for specific spacing guidelines. Generally‚ slats should be evenly distributed across the frame‚ with consistent gaps between each one.
Avoid overcrowding or leaving excessive space‚ as this can compromise support. Ensure each slat rests securely on its designated support‚ preventing movement or slippage. Proper spacing distributes weight evenly‚ extending mattress life and ensuring comfortable sleep. Consistent alignment is key for smooth gas lift operation.
Ensuring Slat Stability
Slat stability directly impacts the bed’s overall durability and your sleep quality. Confirm each slat is firmly seated within its designated holders‚ preventing lateral movement. Inspect for any warping or damage to the slats themselves; replace if necessary. Utilize any provided securing mechanisms‚ like caps or brackets‚ to reinforce connections.
Regularly check slat placement‚ especially after initial use‚ as shifting can occur. A stable slat system prevents squeaking and ensures even weight distribution. Addressing instability promptly avoids potential damage to the gas lift mechanism and frame. Prioritize a secure foundation for optimal support.
Connecting the Bed Base to the Gas Lift
Carefully align the bed base with the mounted gas lift struts‚ ensuring proper orientation as per the instructions. Securely attach the base using the provided bolts and washers‚ tightening them firmly but avoiding over-tightening. Double-check all connections for stability before proceeding.
This step is crucial for the gas lift mechanism to function correctly. Improper attachment can lead to instability or damage. Refer to the diagrams in the assembly instructions for precise placement. Ensure the base is level and balanced on the struts before applying weight. A secure connection guarantees smooth lifting and lowering.
Installing the Headboard (If Applicable)
If your Artiss gas lift bed model includes a headboard‚ carefully position it at the head of the assembled frame. Align the headboard’s mounting points with those on the bed frame. Secure it using the bolts and washers provided‚ tightening them gradually and evenly.
Ensure the headboard is firmly attached and doesn’t wobble. Some models may require additional brackets for enhanced stability. Refer to the specific instructions included with your headboard for detailed guidance. Proper installation ensures both aesthetic appeal and structural integrity. A well-secured headboard adds a finishing touch to your bed.
Testing the Gas Lift Functionality
After completing the assembly‚ thoroughly test the gas lift mechanism. Gently lift and lower the bed platform several times‚ observing its movement; Ensure it operates smoothly without any resistance or unusual noises. Check for even lifting and lowering on both sides.
If the lift feels stiff or uneven‚ re-examine the strut connections and ensure they are securely fastened. A smooth operation indicates correct installation. Watch Aysar3000’s TikTok videos for a visual demonstration of proper functionality. Confirm the locking mechanism engages securely in both the open and closed positions.
Initial Lift and Lowering Tests
Begin with cautious initial tests of the gas lift. Slowly attempt to lift the bed platform‚ applying gentle pressure. Observe how easily it rises and whether it feels balanced. Repeat the process‚ lowering the platform gradually. Listen for any creaking or grinding sounds‚ which could indicate an issue with the struts or connections.
These first tests are crucial for identifying any immediate problems before fully utilizing the bed’s storage capacity. Refer to Instocks’ assembly tutorials if you encounter resistance. Ensure a clear space around the bed during testing to prevent accidental collisions.
Checking for Smooth Operation
After the initial tests‚ repeatedly lift and lower the bed platform several times. Pay close attention to the smoothness of the motion – it should be fluid and consistent throughout the entire range. Verify that the platform locks securely in both the raised and lowered positions. Any hesitation‚ jerking‚ or uneven movement suggests a potential misalignment or issue with the gas lift mechanism.
Consult Aysar3000’s videos for visual guidance on proper operation. Ensure no obstructions hinder the lifting process. A smooth operation guarantees safe and convenient access to the under-bed storage.
Troubleshooting Common Assembly Issues
During assembly‚ squeaking noises often arise from friction points. Inspect all connections – side rails‚ headboard‚ footboard – and tighten bolts accordingly. Lubrication with a silicone-based spray can also alleviate these sounds. Alignment problems can occur if the frame isn’t perfectly square; re-check measurements and adjust as needed.
If the gas lift isn’t functioning correctly‚ revisit the mounting steps‚ ensuring secure attachment. Refer to Instocks’ tutorials for visual assistance. Addressing these issues promptly ensures a stable and functional bed frame.
Addressing Squeaking Noises
Squeaking sounds during use typically indicate friction between metal components. Begin by systematically tightening all bolts and screws on the bed frame – side rails‚ headboard‚ footboard‚ and gas lift mechanism. Pay close attention to connections where parts rub against each other. A silicone-based lubricant spray is highly effective; apply it sparingly to these friction points.
Ensure the slats are securely in place and aren’t rubbing against the frame. If squeaking persists‚ double-check the gas lift strut mounting points for tightness. Regular maintenance with lubrication will prevent future noise issues.
Fixing Alignment Problems
Misalignment often occurs during initial assembly. First‚ loosen the bolts connecting the side rails‚ headboard‚ and footboard‚ allowing for slight adjustments. Carefully reposition the frame components to ensure squareness and even spacing. Re-tighten the bolts gradually‚ checking alignment after each adjustment.
If the gas lift mechanism appears crooked‚ verify the struts are mounted correctly and symmetrically on both sides. Inspect the slat supports for even distribution. Consult online resources‚ like Instocks or Aysar3000 videos‚ for visual guidance on proper alignment techniques.
Maintaining Your Artiss Gas Lift Bed
Regular maintenance ensures longevity and smooth operation. Inspect all components – frame‚ slats‚ gas lift struts‚ and fixings – monthly for signs of wear or loosening. Tighten any loose bolts or screws immediately. Periodically check the gas lift mechanism for smooth movement‚ addressing any stiffness promptly.
For cleaning‚ use a damp cloth to wipe down the frame and headboard; avoid harsh chemicals. Protect the gas lift struts from excessive moisture. Consistent care prevents squeaking and maintains the bed’s functionality‚ preserving your investment in quality sleep.
Regular Inspection of Components
Consistent checks are vital for a safe and functional gas lift bed. Monthly‚ examine the bed frame for cracks or bends‚ paying close attention to weld points. Inspect the slat supports‚ ensuring they remain securely attached and undamaged. Carefully assess the gas lift struts for any signs of leakage or corrosion – these are critical for safe operation.
Also‚ verify all bolts and screws are tightened‚ preventing unwanted movement and noise. Don’t overlook the headboard’s stability. Proactive inspection identifies potential issues before they escalate‚ ensuring lasting comfort and safety.
Cleaning and Care Instructions
To maintain your Artiss gas lift bed’s appearance and longevity‚ regular cleaning is essential. Use a soft‚ damp cloth to wipe down the frame and headboard‚ avoiding harsh chemicals or abrasive cleaners. For leatherette finishes‚ specialized leather cleaners are recommended. Vacuum regularly under the bed to prevent dust buildup.
Avoid placing excessive weight on the lifting mechanism when the bed is open. Periodically‚ apply silicone lubricant to the gas lift struts for smooth operation. Protect the bed from direct sunlight and extreme temperatures to prevent fading or damage.
Video Tutorials and Online Resources
For a visual guide to assembling your Artiss gas lift bed‚ numerous online resources are available. Instocks offers comprehensive tutorial videos on their YouTube channel‚ demonstrating each assembly step clearly. Aysar3000‚ on TikTok‚ provides quick and helpful assembly demonstrations‚ particularly for black leather models.
These videos complement the written instructions‚ making the process easier to understand. Links to these resources can be found readily online. Sharing your own assembly experience through videos is also encouraged‚ fostering a community of helpful users!

Links to Instocks and Aysar3000 Videos

Access the Instocks YouTube channel for detailed assembly tutorials covering various Artiss bed frame models. Their videos break down each step‚ ensuring a smooth assembly experience: Instocks YouTube Channel. Explore their playlist dedicated to bed frame assembly for specific guidance.
For a quick visual overview‚ check out Aysar3000’s TikTok showcasing the Artiss bed frame with a gas lift: Aysar3000 TikTok. These short videos are perfect for a quick reference during the assembly process. Utilize these resources to enhance your understanding!
Artiss Bed Frame Models (Piuma‚ Bellezza‚ etc.)
Artiss offers a diverse range of bed frames designed to suit various preferences and bedroom aesthetics. Popular models include the Piuma luxurious bed frame‚ known for its elegant design‚ and the Bellezza bed frame‚ offering both style and functionality. You can also find options without a gas lift mechanism for those seeking a simpler design.
The 3-in-1 bed frames maximize storage capacity and feature convenient gas lift access. These models‚ like the BFRAME-G-LED-LUMI-D/Q‚ combine sleeping space with hidden storage‚ perfect for smaller rooms. Explore the full Artiss collection to find the ideal bed frame for your needs!
Warranty Information and Customer Support
Artiss stands behind the quality of its gas lift bed frames‚ offering a comprehensive warranty to ensure customer satisfaction. Details regarding the warranty period and coverage can be found on the Artiss website or within the product packaging. Should you encounter any issues during or after assembly‚ Artiss provides dedicated customer support.
For assistance‚ reach out through their official channels‚ including email or phone support. Numerous online resources‚ including Instocks and Aysar3000’s video tutorials‚ can also help resolve common assembly questions. Don’t hesitate to contact Artiss for any concerns regarding your bed frame!
Related Posts

let’s feed the hungry caterpillar game instructions
Join the adventure with the Hungry Caterpillar! Discover a fun and educational game perfect for kids. Learn and play on the official site today!

bosch classixx washing machine user manual
Find your Bosch Classixx washing machine user manual here! Easy guide, troubleshooting tips, and download instructions to get your appliance running smoothly.

pdf the very hungry caterpillar
Discover the beloved tale of The Very Hungry Caterpillar in Australia. Explore fun activities, crafts, and educational resources for kids!